
1 of 1
Animation generating…
Your animation is being created. It’ll appear here automatically when it’s ready.
Description
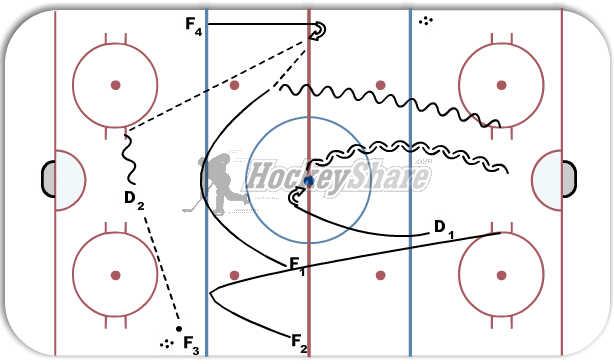
D1 - Closes gap on F1 and F2 after making their pass, prepares to play 2 on 1.
After receiving the pass from F1, F3 passes to D2 and remains in line.
F4 - Leaves the zone, provides D2 with high option.
D2 - Makes the pass to F4, doesn't join the play.
F1 and F2 - Time their route to provide options for passes.
F4 - Makes a quick pass back to F1, then returns to line.
F1 and F2 attack D1 2 on 1 and finish the play.
Drill then begins at opposite end, puck starts with F3.
Key Points
Transition