
1 of 1
Animation generating…
Your animation is being created. It’ll appear here automatically when it’s ready.
Description
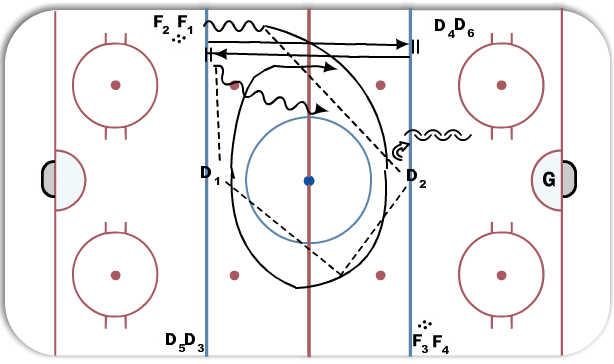
F1 and F2 take off at same time. F1 does loop through the nuetral zone as shown. F2 goes blue line to blue line as shown.
Drill can be done on both sides simotaneously. As soon as D makes final pass they immediately get ready to defend 2 on 1.
Key Points
Quick Transition for both F and D.
Notes
To increase difficulty can have D utilize either forward for nutral zone pass, so F2 must be aware.