
1 of 1
Animation generating…
Your animation is being created. It’ll appear here automatically when it’s ready.
Description
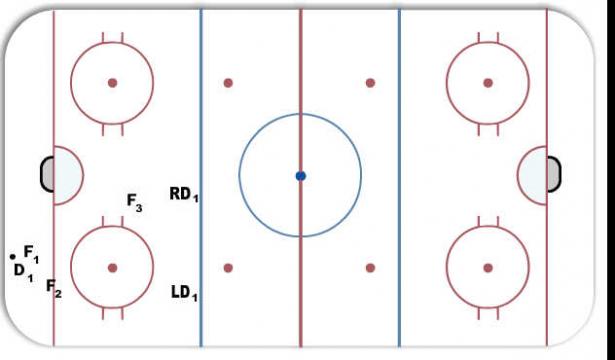
Simple 2-1-2 Offensive Zone strategy. First 2 forwards entering zone put pressure on D1
First forward in attacks puck while second forward (F2) supports play and ensures F1 wins battle or awaits for loose puck
F3 stays high in the zone, roaming around to get in position for shot
D2 and D3 are inside of Blue Line supporting the play. Notice gap in between D2 and D3 is
short. Keep Defense in close proximity of each other in the event puck comes back to the point both D are within a short pass of each other.
Key Points
Offensive Zone System
Positioning (Left Side)
Supporting the Play
Competitive Play
Notes
F3 is important here, as he/she could be the best threat to score as well as he/she could be the first back checker to support Defense in the event the opposing team gets possession of the puck and initiates a break out.
Practice F1 and F2 to form a 2-1 situation (give n go) in the corners if there is only on defender.